
This post may include affiliate links, view our disclosure policy for details.
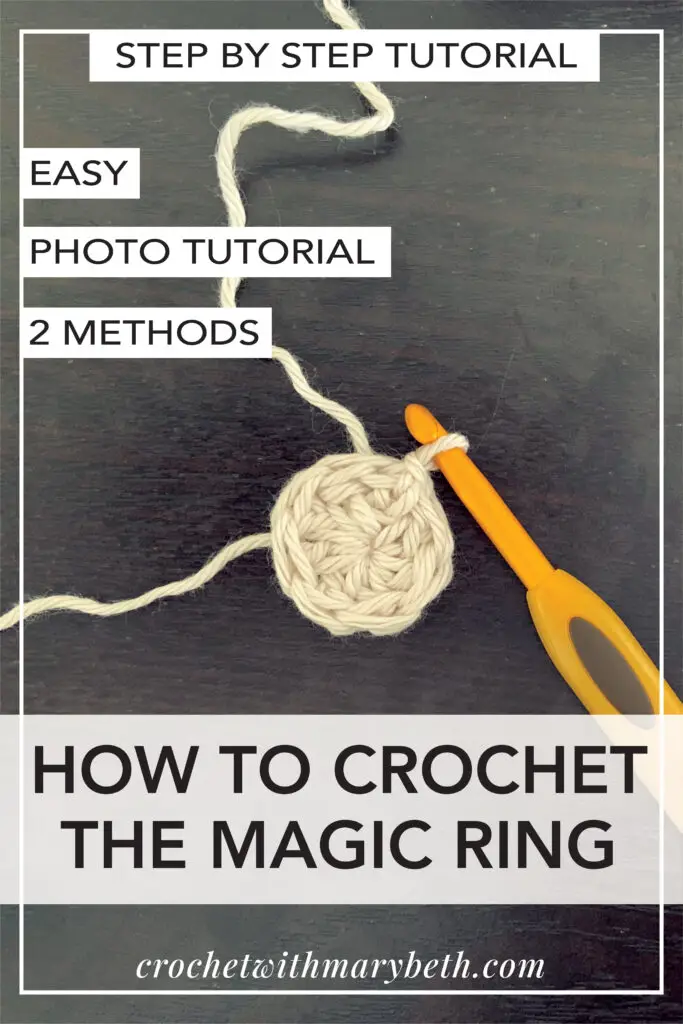
What is the Crochet Magic Ring?
The crochet magic ring, sometimes called the magic circle or adjustable ring, is used for stitching in the round. It is an alternative to stitching a number of chains, joining, and then crocheting into the formed circle.
Advantages of the Magic Ring
As opposed to stitching into a circle formed by chains, the magic ring is adjustable and eliminates the hole in the center of your circle.
The first time you try this technique your jaw will hit the floor. Finally you will be able to attain a gorgeous crocheted circle with a tight center.

Overview of the Magic Ring
Below you will find two different methods for starting the magic ring. The idea of both is the same. You will first loop the yarn around to make the magic circle, stitch into it, and then pull the tail to tighten the stitches until there is no hole in the center.
Beginners and the Crochet Magic Ring
Fear not, the magic circle is easy. Just like all magic ticks once you know the secret and practice a few times the illusion is simple.
It does feel awkward at first and will take a few tries to get the hang of it. But keep practicing and it will be your new favorite technique. You can do this!
I’ve included two different methods so if one doesn’t work for you, you can try the other.
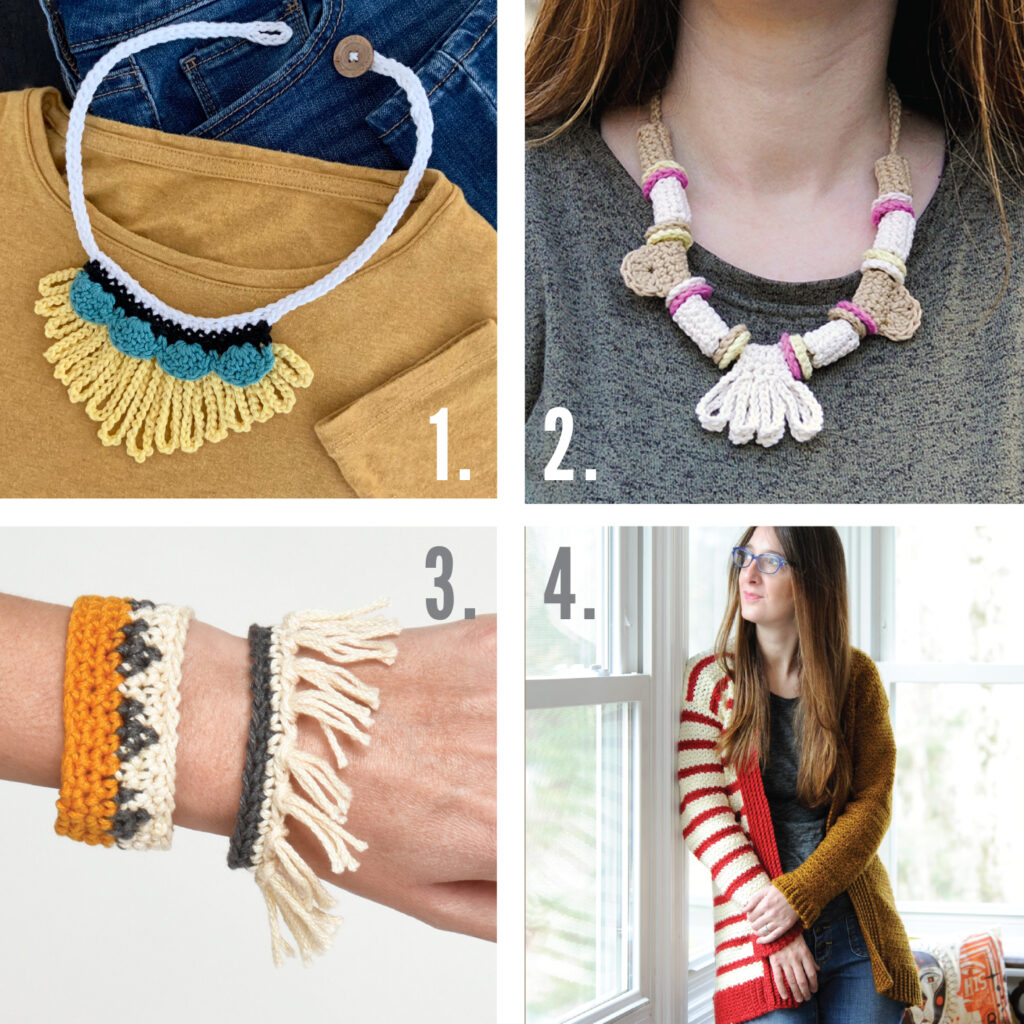
Projects that use the Magic Circle
The magic circle is especially good for making circles that will be used as balls and stuffed. You will not have to worry about stuffing coming out of the center of your ball.
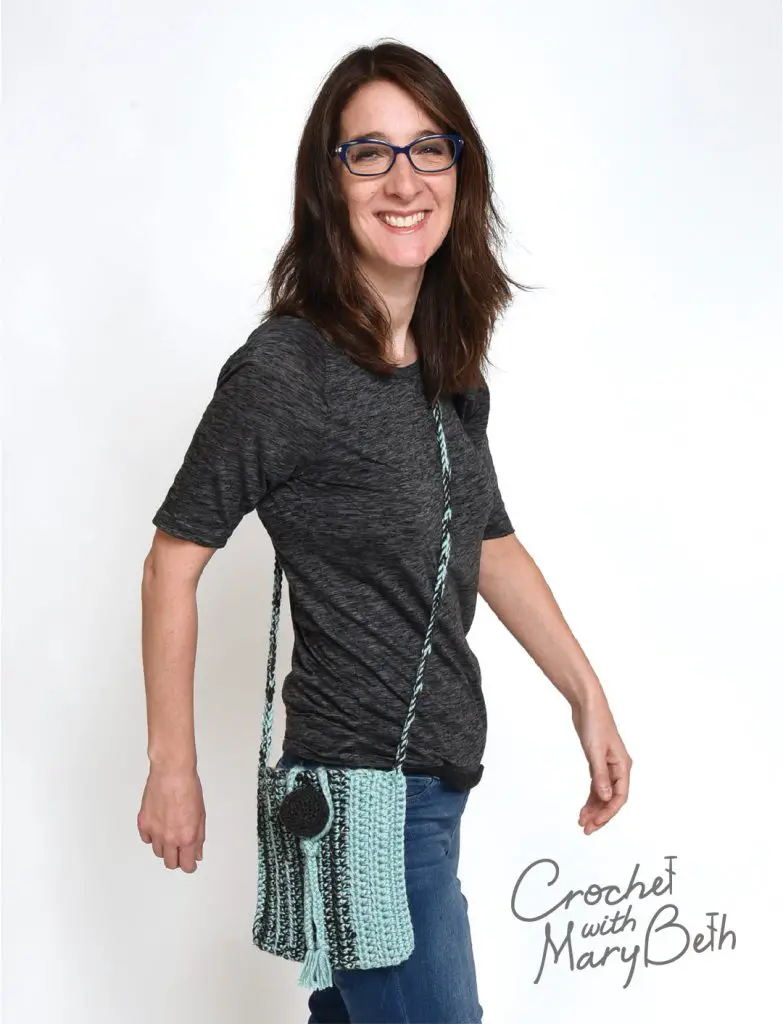
Here are two bags I have designed that use circles made with the magic ring.
The first is my favorite bag. It’s the 9 Ball Tote. I use it all the time to carry my books to the library. It’s a very sturdy tote.
You can find the free pattern here: 9 Ball Tote
Look a those nice tight circle centers!!

The second is the bag I use the most. It’s the Ball Button Crossbody Bag.
It’s a super light weight bag and I use it to throw just my keys, phone, and license in when my son and I are headed to the park.
You can find the free pattern here: Ball Button Crossbody Bag
Magic Circle Tutorial:
Below I walk you through 2 different ways to make the crochet magic ring. The yarn is moved in the same way in each. The difference is the way you hold your yarn.
Choose your favorite. Let the magic begin!
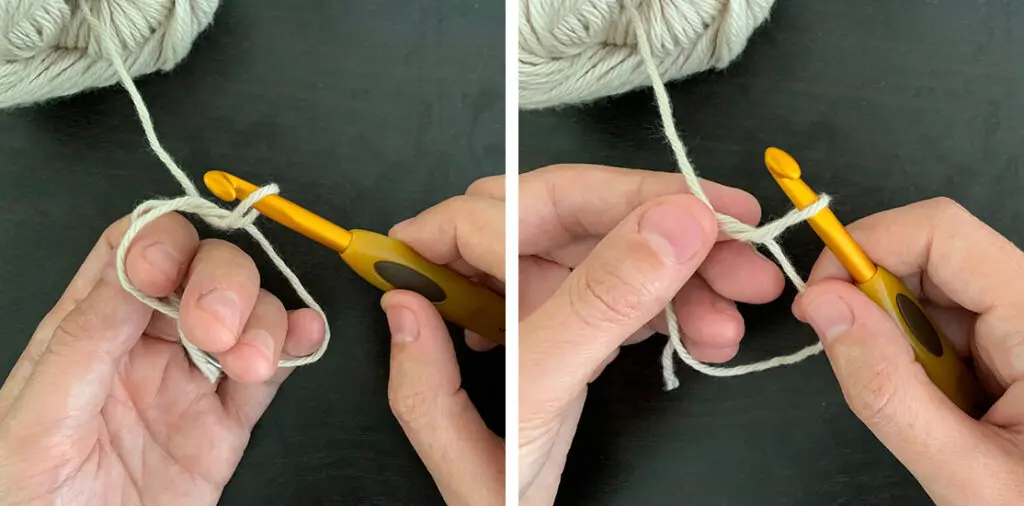
Magic ring tutorial method one
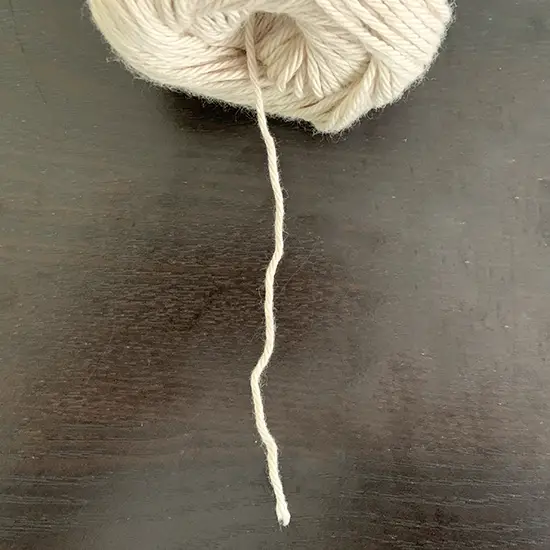
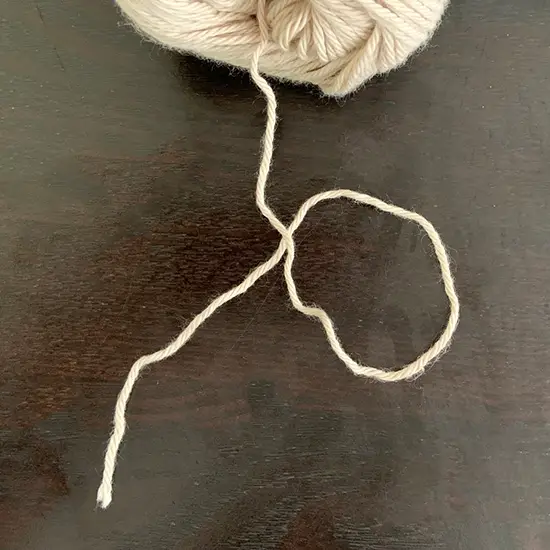
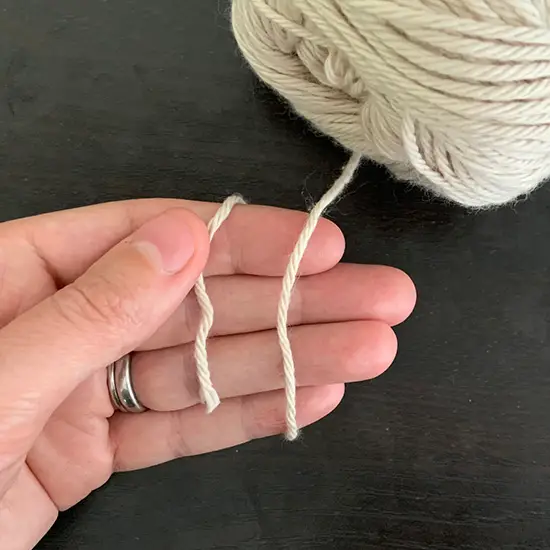
Step 1. Lay out your yarn in a straight line with your working yarn on top and the tail facing down.
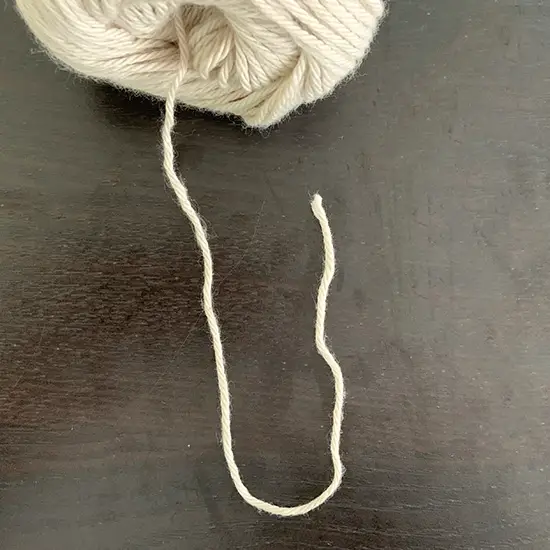
Step 2. Shape the tail into a U.
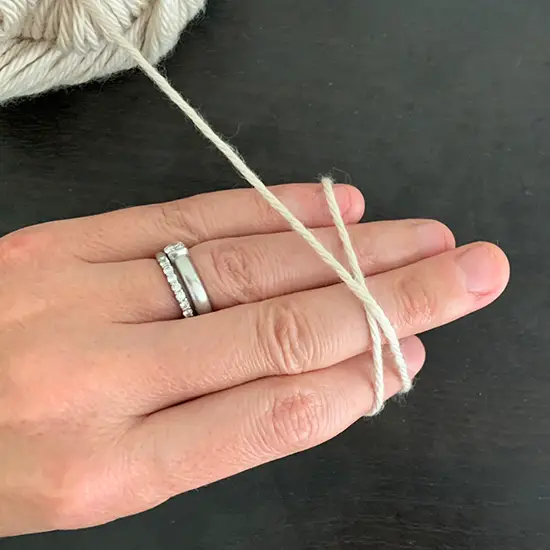
Step 3. Cross the tail under itself to make an O. It’s important that the yarn crosses under.
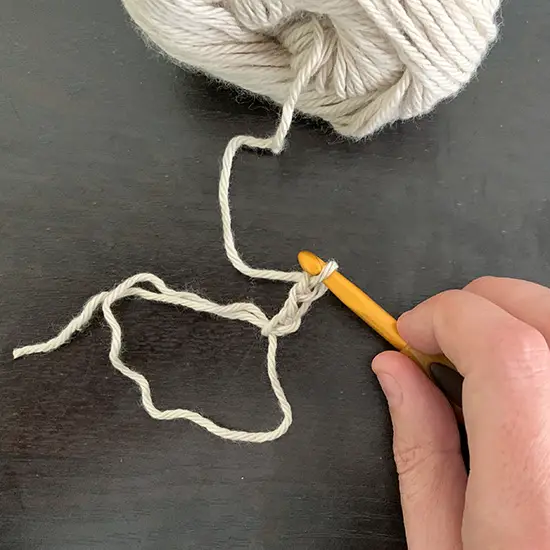
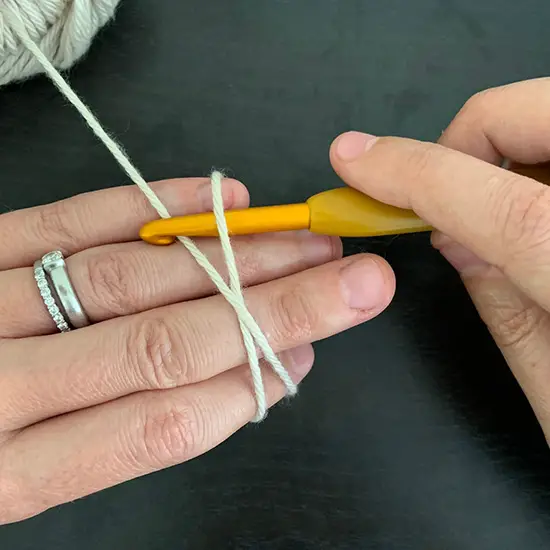
Step 4. Reach through the O with your crochet hook facing down. Grab the working yarn, draw up a loop.
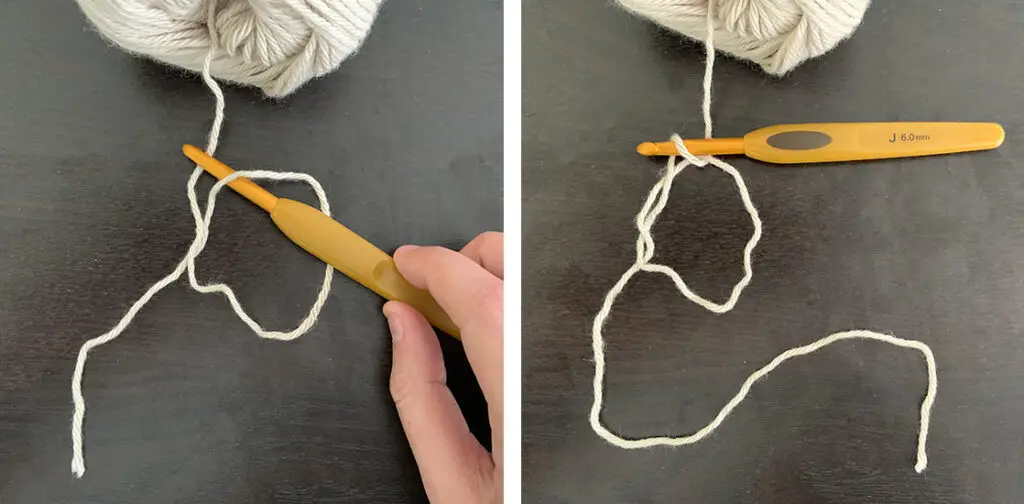
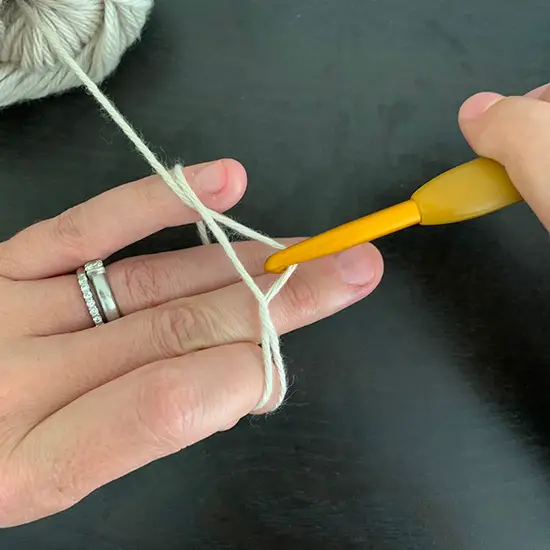
Step 5. Yarn over with the working yarn and draw up a loop to form a chain.
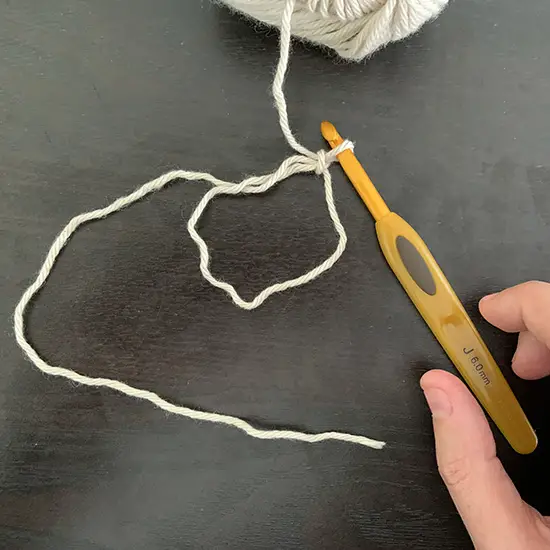
Step 6. You can now pick up your magic ring by pinching the area where the yarn crosses and start your pattern.
Start your pattern here
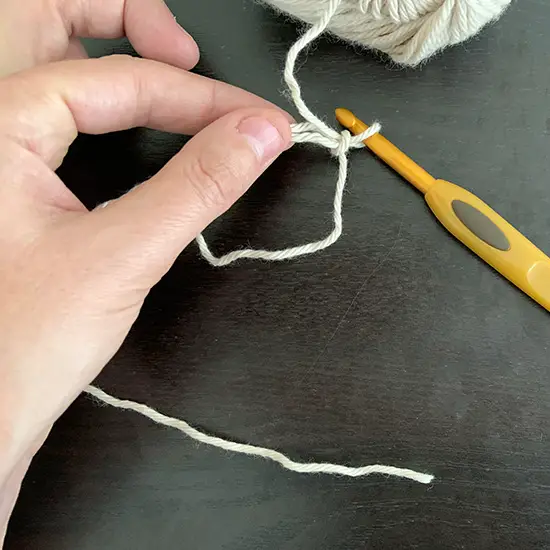
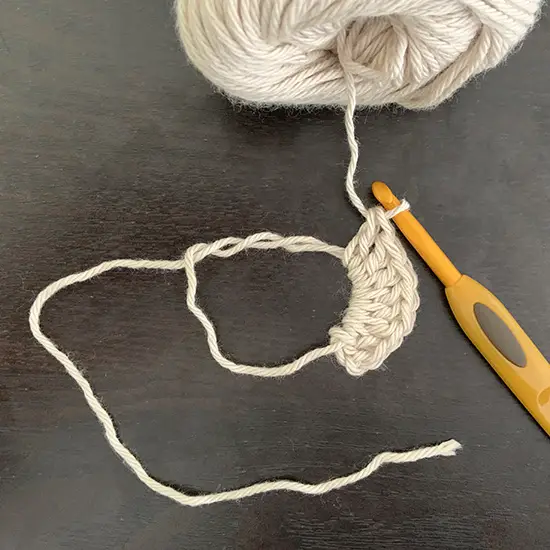
Step 7. Chain as many as your pattern requires. For this example I will be using double crochet, so I will chain 3. I do not count the chain from step 5 as one of the 3 chains.
Step 8. Crochet into the circle the number of stitches your pattern requires. You will be crocheting over the area where the yarn crosses. It is okay if the area where the yarn crosses is not visible because it is under your stitches. Just keep the tail free. Here I made 7 dc.
Step 9. Get excited for the magic. Hold onto your stitches with one hand and pull the yarn tail with the other. Your circle will magically close. So cool right?!
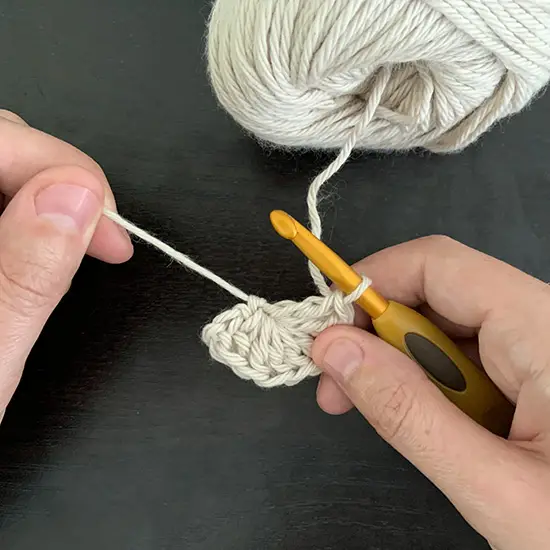
Step 10. Follow your pattern’s instructions for the next step. You will either join to the first stitch or stitch into the first stitch. Then give another tug on the tail to make your magic circle perfectly closed. Now continue on with your project. Here I joined to the top of the chain 3 with a slip stitch.
The magic circle can be awkward at first, but after some practice it will seem natural and you will be a crochet magician!
Magic ring tutorial method 2:
Here is a second way to crochet a magic circle. This is the way that I learned. However, I now mostly use method 1.
1: Hold the yarn with the working yarn behind your hand and tail hanging down in front.
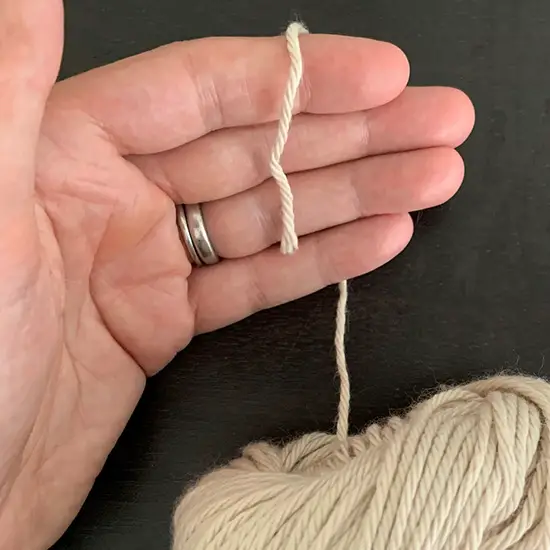
2: Wrap the working yarn up over the front of your hand.
3: Wrap the working yarn back down over the back of your hand forming an X.
4: With your crochet hook, reach under the first strand and grab the second strand.
5: Pull the strand under the first.
6: Slide your hand out. Pinch the area where the yarn crosses to hold your loop together.
7. Yarn over with the working yarn and draw up a loop to form a chain.

You are now at the same point as Method 1: Step 7. You can start your pattern by chaining the number of required chains. Please refer back to Method 1 if you would like to see the photos of Steps 7 through 10.
I hope one of these methods works for you!
If you enjoyed this post, check out these next:


Mary Beth Cryan has been designing crochet patterns for over 4 years. Prior, Mary Beth worked as a professional illustrator and product designer with a specialty in paper crafts for 18 years. She has authored and illustrated 17 paper craft books, countless pop-up greeting cards, and many paper craft kits. She received 3 LOUIE Awards from the National Greeting Card Association. Some of her clients included MoMA (Museum of Modern Art NYC), American Girl, Dover Publications, Peter Pauper Press, Ranger Rick Magazine, Highlights magazine and many others. She earned a Bachelor of Fine Arts from Syracuse University in 2000.