
This post may include affiliate links, view our disclosure policy for details.
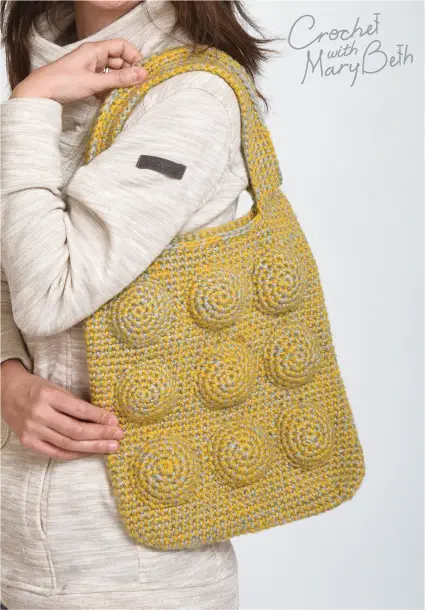
Are you ready for the fourth and final bag in my “Seeing Spots” collection? Hold onto your crocheted hats because here it is, the 9 Ball Tote! It’s humorous but totally wearable, fun and sophisticated. And best of all it’s practical. This baby is durable and makes a great project bag!
Haul this beauty all over town filled with library books, or water bottles, or your current WIP plus the other 30 things you need to leave the house (or is that just me?).
It’s strong because you will be crocheting a tight single crochet throughout the bag while holding two strands of worsted weight yarn together (double the yarn, double the strength, double your pleasure, double your fun, it’s the right one The Doublemint gum).
FYI this pattern is not sponsored by Doublemint Gum but that would have been an awesome tie in if it was! But seriously, the fabric is thick and strong.
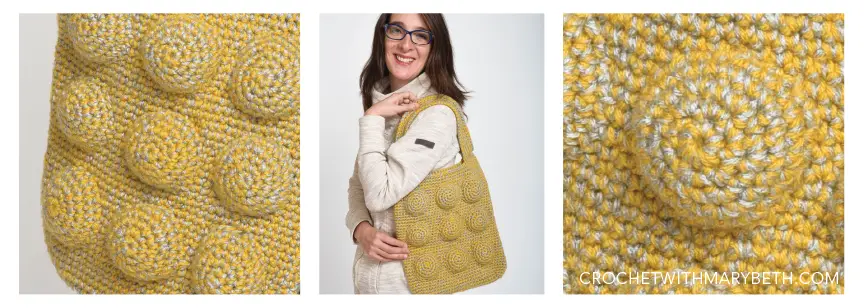
Even your cracker crumbs aren’t going to fall through this bag. It’s that dense.
This bag was inspired by my crochet roots in amigurumi. I eventually worked my way over to fashion accessories.
But I still love amigurumi and thought it would be really fun to incorporated those humorous, lovable shapes into a sophisticated bag for fashionable women. Could I do it? I just did!!
Purchase the pdf:
Save for later:
9 Ball Tote Crochet Pattern
Materials:
- Lion Brand Vanna’s Choice, Solids, worsted 4-Medium (100% acrylic blend, 170 yds/156 m, 3.5 oz/100 g), Color (A) Mustard, 3 skeins
- Lion Brand Vanna’s Choice, Heathers, worsted 4-Medium (100% acrylic blend, 145 yds/133 m, 3 oz/85 g), Color (B) Silver Heather, 3 skeins

- Crochet hook size US J/10 (6 mm)
- Tapestry needle
- Stitch Markers
- Scissors
- Pins, I use Clover Bamboo Marking Pins
- Stuffing
Gauge:
With one strand of A and B held together as one: 12 stitches and 14 rows = 4”/10 cm in single crochet
Finished Measurements:
Project Level:
Abbreviations:
ch – chain(s)
sc – single crochet
st(s) – stitch(es)
RS – right side
Notes:
- The pattern is written in US terms.
- The Tote is worked from the bottom up.
- ONLY the first 4 rounds of the Tote are joined, all following rounds are worked in a spiral.
- The Half Balls are worked in spiral rounds.
- You will be holding two strands of yarn together throughout the pattern.
- Ch 1 does not count as a sc.
- Skipped ch in round 1 does not count as a stitch.
- This pattern has been tested and professionally tech edited for accuracy and clarity.
Instructions
Tote
With one strand of A and B held together as one, ch 27.
Round 1: (RS) Work 2 sc in 2nd ch from hook, work 1 sc in next 24 ch, work 3 sc in last ch (rounding the corner); working in opposite side of foundation ch, work 1 sc in remaining 25 ch, join with a slip st to first sc– (54 sc).
Round 2: Ch 1, work 2 sc in same sc as join, work 2 sc in next sc, work 1 sc in next 24 sc, work 2 sc in next 3 sc, work 1 sc in next 24 sc, work 2 sc in last sc, join with a slip st to first sc– (60 sc).
Round 3: Ch 1, work 1 sc in same sc as join, work 2 sc in next sc, work 1 sc in next sc, work 2sc in next sc, work 1 sc in next 24 sc, (work 1 sc in next sc, work 2 sc in next sc) three times, work 1 sc in next 24 sc, work 1sc in next sc, work 2 sc in next sc, join with a slip st to first sc– (66 sc).
Round 4: Ch 1, work 1 sc in same sc as join, work 1 sc in next sc, work 2 sc in next sc, work 1 sc in next 2 sc, work 2 sc in next sc, work 1 sc in next 24 sc, (work 1 sc in next 2 sc, work 2 sc in next sc) three times, work 1 sc in next 24 sc, work 1 sc in next 2 sc, work 2 sc in next 1 sc, join with a slip st to first sc– (72 sc).
For the remaining of the pattern do NOT join, work in a spiral instead.
Round 5: Ch 1, work 1 sc in same sc as join, place a stitch maker in the first sc and move it up as you work, sc in each sc around, do NOT join here or for the remainder of the pattern– (72 sc).
Rounds 6-43: Work 1 sc in each sc around.
Handles
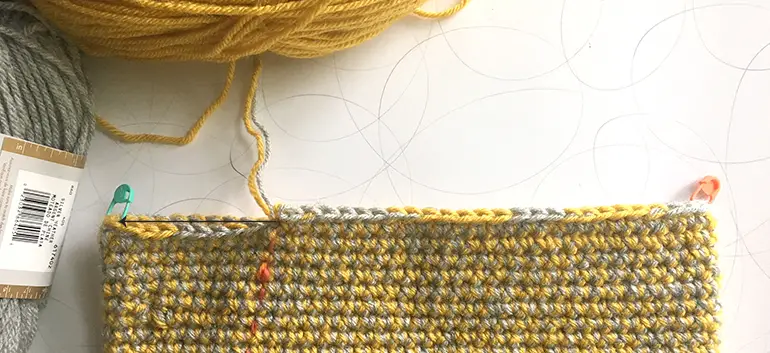
Round 1: Lay bag flat with side with last sc worked facing up, place a stitch marker in the sc on the left most edge of the bag (image 1a). The marked stitch is the new beginning of the round. Work 1 sc in each sc up to the marker, do not sc in the marked sc (image 1a)– (10 sc, count may vary).
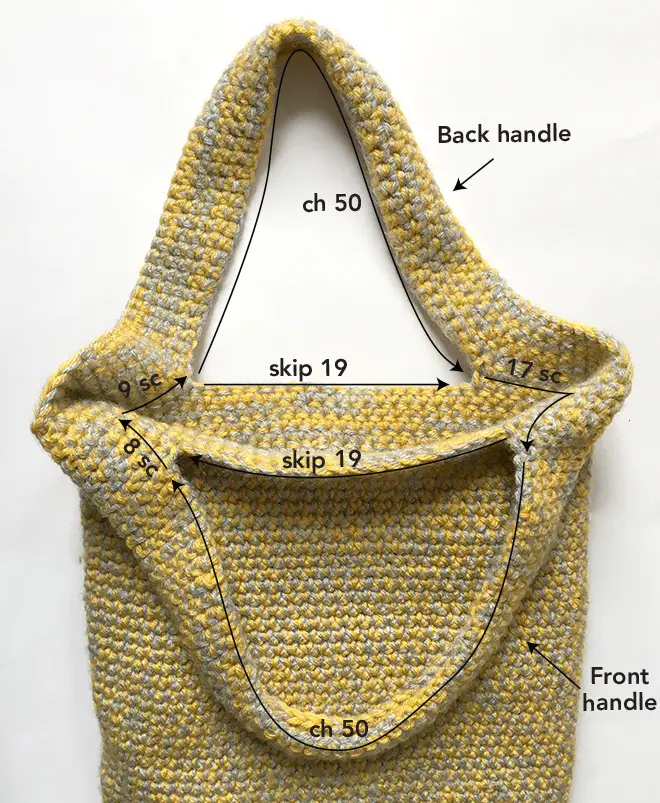
Round 2: Work 1 sc in marked sc, work 1 sc in next 8 sc, ch 50, skip 19 sc, work 1 sc in next 17 sc, ch 50, skip 19 sc, work 1 sc in next 8 sc (image 1b)– (34 sc, 100 ch).
Round 3: Work 1 sc in next 9 sc, work 1 sc in next 50 ch (work 1 sc into each chain as you would work the first row of sc into a foundation chain NOT into the chain space or around the chain), work 1 sc in next 17 sc, work 1 sc in next 50 ch, work 1 sc in next 8 sc– (134 sc).
Rounds 4-7: Work 1 sc in each sc around.
Fasten off with an invisible join, weave in ends using a tapestry needle.
Half Balls (make 9)
With one strand of A and B held together as one, make a magic ring or ch 3 and sl st in first ch to form a loop. You can view a step by step video tutorial of the magic ring HERE.
Round 1: Ch 1, work 6 sc in ring, place marker in first sc of round and move it up as you work the rounds– (6 sc).
Round 2: Work 2 sc in each sc around– (12 sc).
Round 3: (work 2 sc in next sc, work 1 sc in next sc) around– (18 sc).
Round 4: (work 2 sc in next sc, work 1 sc in next 2 sc) around– (24 sc).
Round 5: (work 2 sc in next st, work 1 sc in next 3 sc) around– (30 sc).
Fasten off leaving a 39”/99 cm tail to sew to bag (I err on the side of extra length).
Finishing
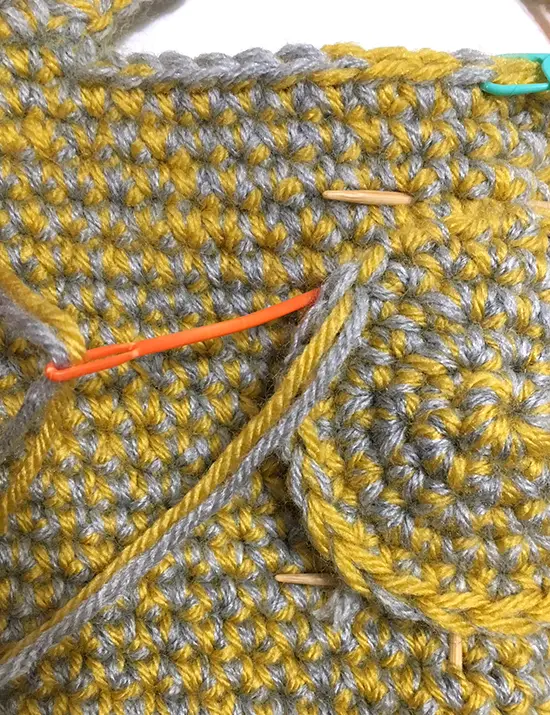
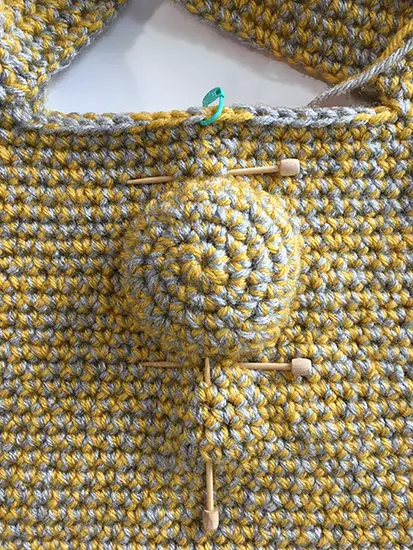
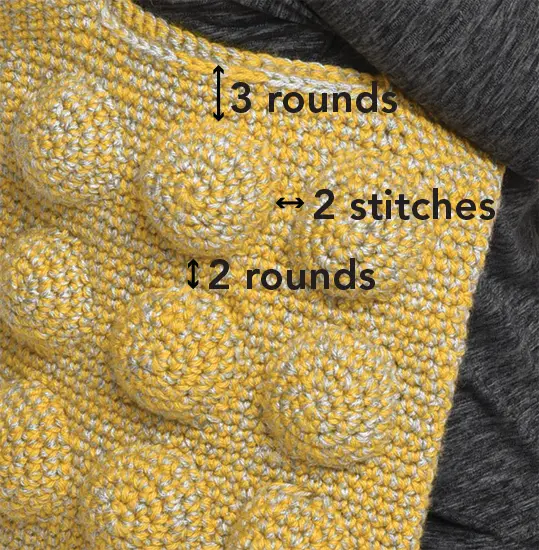
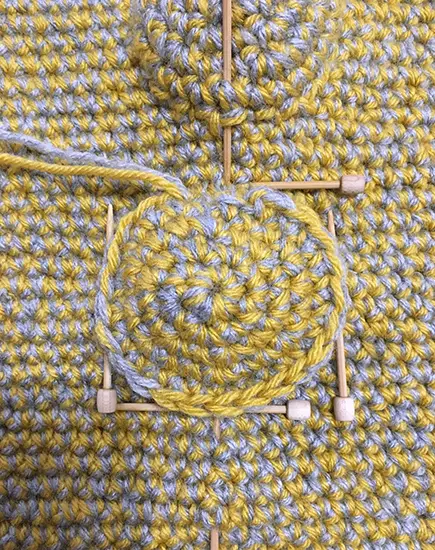
Pin first half ball to center RS of tote 3 rounds down from the top edge (each half ball should take up 10 rounds on the tote from top to bottom and 9 stitches from side to side). With your fingers, shape your half balls into nice rounded shapes. With the tail of the half ball whip stitch (image 2) to the tote until 6 stitches remain. I found it easier to pin around where the bag will be fastened instead of pinning the ball directly to the bag. See the “Tip” and (image 5) below.
Stuff but do not overstuff or your half balls will stick too far out. Whip stitch closed. Fasten off. Weave in ends using tapestry needle (image 3).
Repeat with the remaining 8 half balls. Leave two stitches showing above and to the side of each half ball and 3 rounds from the top of bag (image 4).
Tip: Place pins to indicate where the half ball will be fastened (image 5).
Then hold the half ball in place while whip stitching (image 6). You’re done!


Mary Beth Cryan has been designing crochet patterns for over 4 years. Prior, Mary Beth worked as a professional illustrator and product designer with a specialty in paper crafts for 18 years. She has authored and illustrated 17 paper craft books, countless pop-up greeting cards, and many paper craft kits. She received 3 LOUIE Awards from the National Greeting Card Association. Some of her clients included MoMA (Museum of Modern Art NYC), American Girl, Dover Publications, Peter Pauper Press, Ranger Rick Magazine, Highlights magazine and many others. She earned a Bachelor of Fine Arts from Syracuse University in 2000.