
This post may include affiliate links, view our disclosure policy for details.
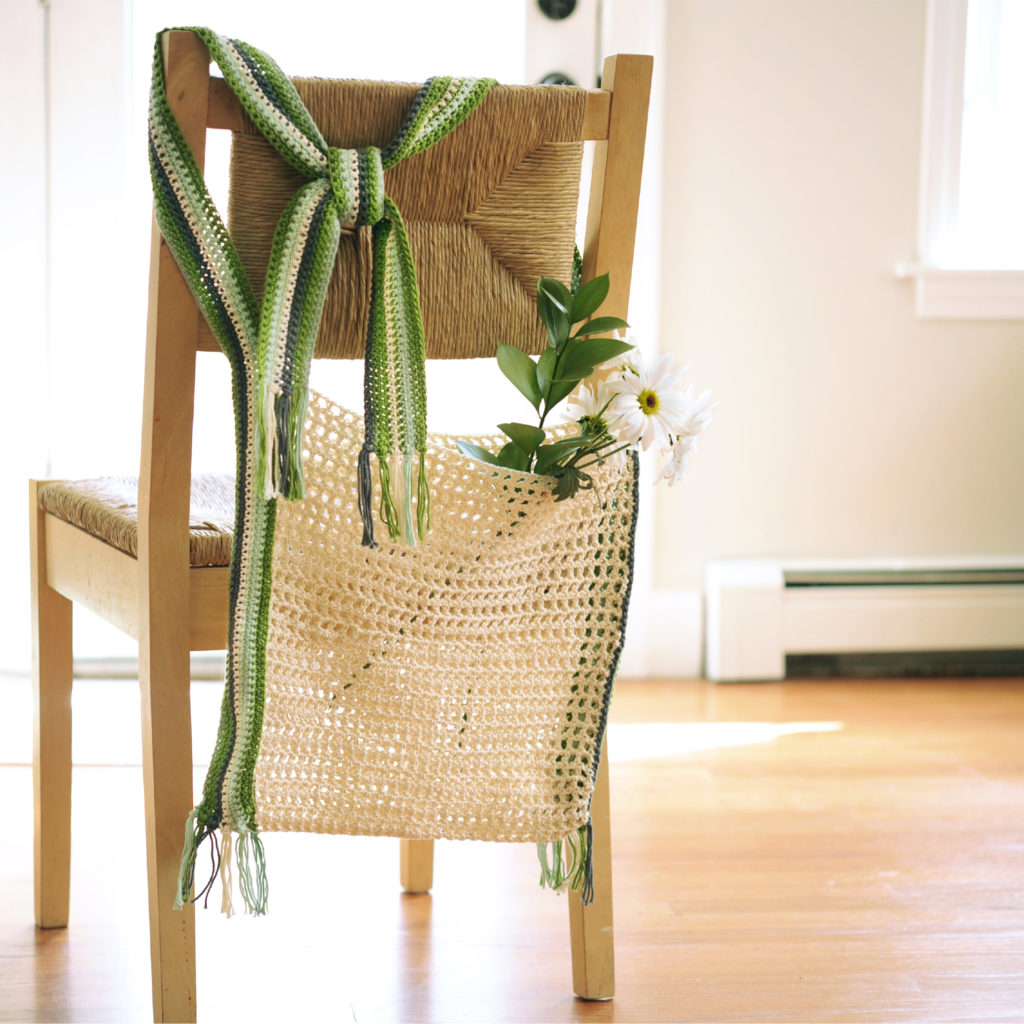
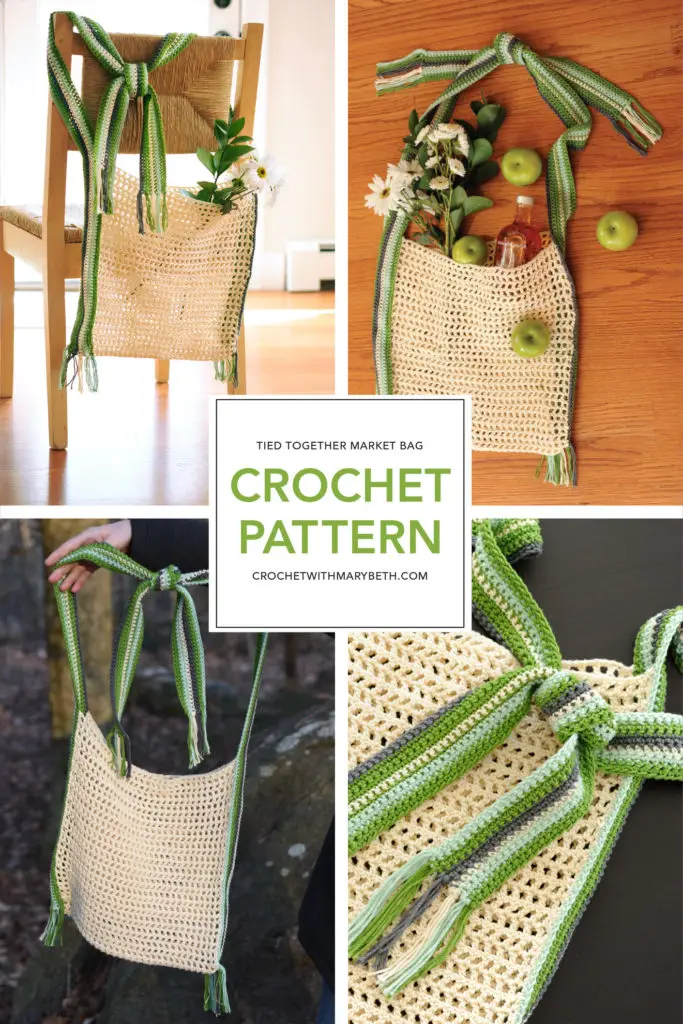
Introducing the Tied Together Market Bag crochet pattern, a stylish, sturdy, easy to make bag that’s going to have you harvesting bountiful compliments at the next farmer’s market.
Download your free PDF here
You can download the free pdf here.
Or view more pictures of the bag and the pattern by scrolling down.
Story
This little piggy went to market with his Tied Together Market Bag.
This little piggy stayed home and crocheted one up for himself because he thought it was very stylish and there was no way he was showing up at the market with last year’s crochet market bag.
The other three piggies went to the yarn store to buy some 24/7 cotton so they could each make one too.
Details
Besides being right on trend with its cool tied shoulder handle (have you seen them in the stores) this crocheted market bag is practical too.
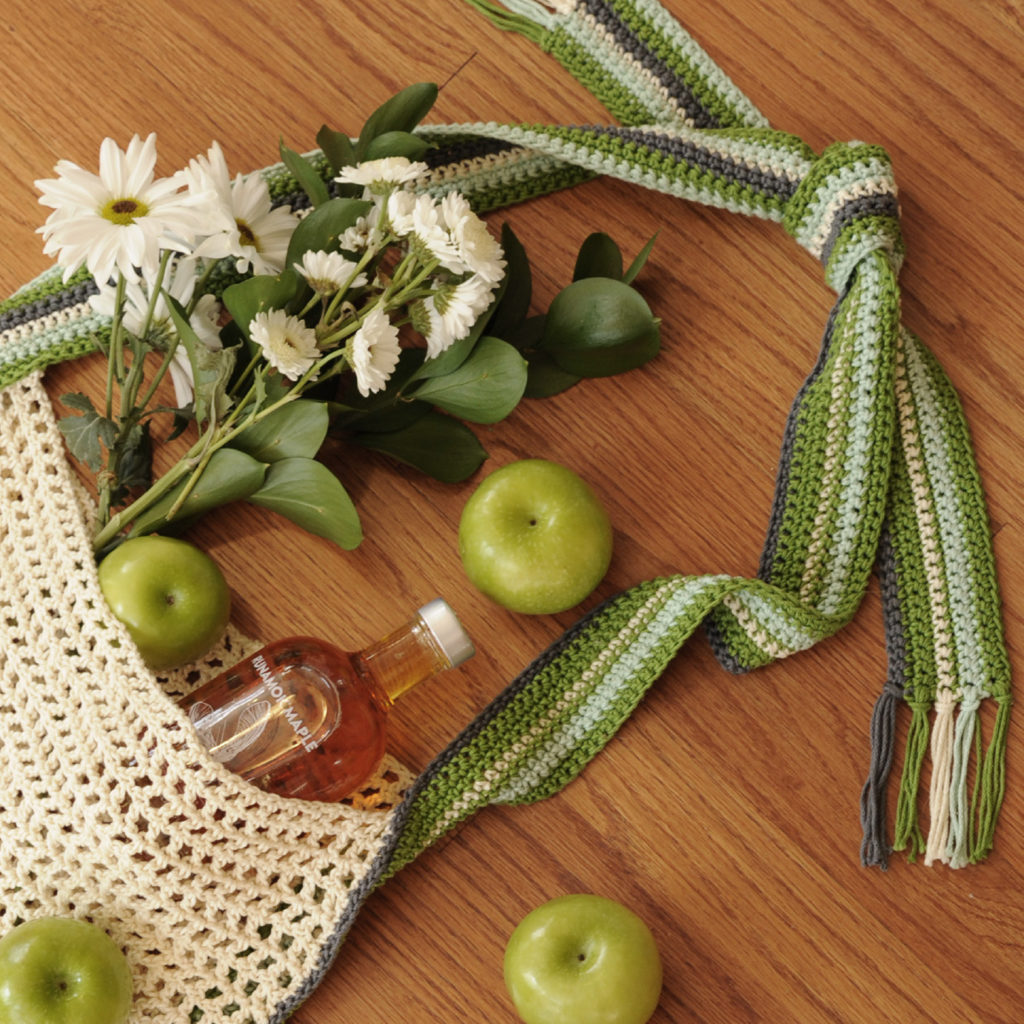
The tote part of the bag is 14.5” x 13.5.” You can fit a lot of kumquats in this baby!
It’s also strong, there isn’t a seam along the bottom. The sides are constructed with single crochet, keeping the bag nice and sturdy.
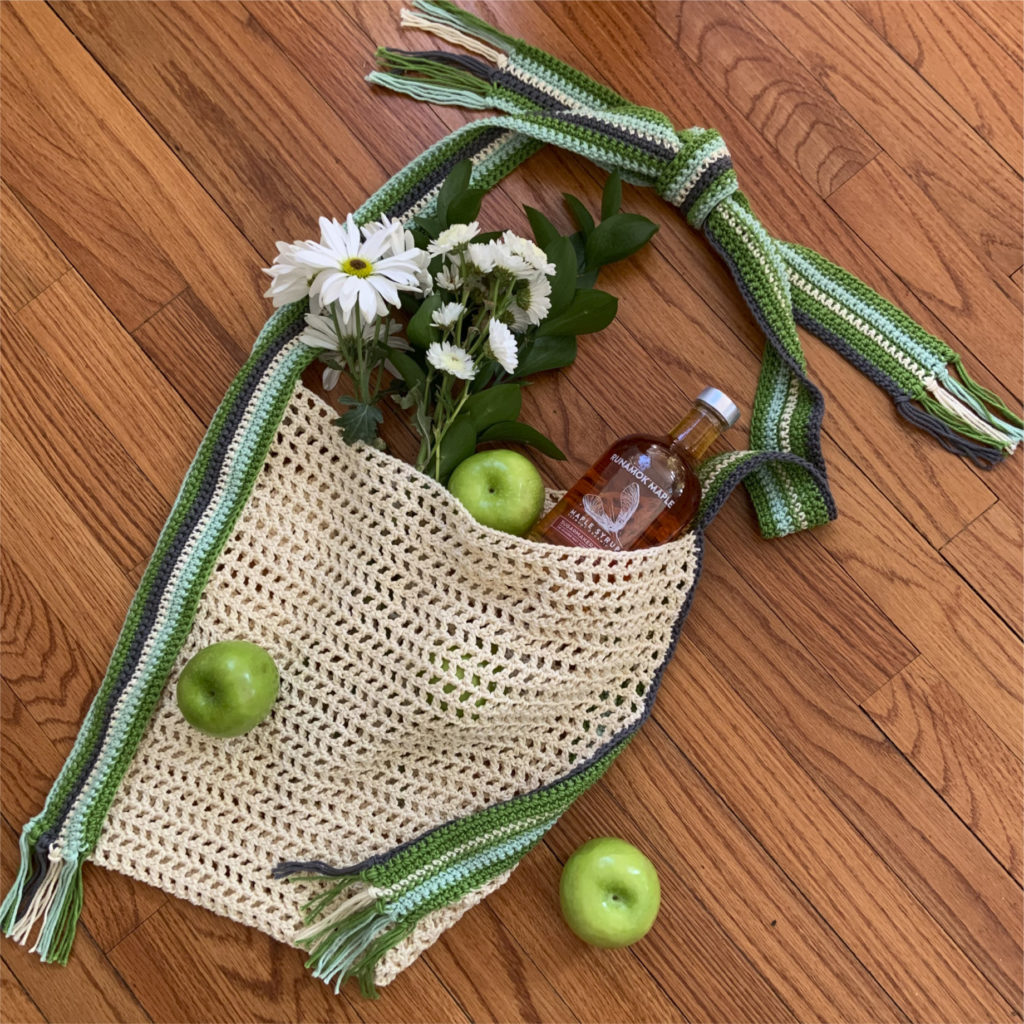
As far as the aesthetics I stuck with the usual feminine but not cutesy look that you can expect from me. I achieved this by choosing the “Small Mesh” stitch. I love a good geometric crochet stitch! Don’t you? And I continued with the geometric theme by adding stripes to the straps.
Feel free to customize this crochet bag up! You can change the colors of the stripes, eliminate the stripes, make the straps two different colors, delete the fringe, add more fringe, tie the knot higher or lower. Make it your own! You do you! Rock that farmers market Mama!!
Tied Together Market Bag
Materials:
- Lion Brand 24/7 Cotton Yarn, worsted weight #4 yarn (100% mercerized cotton; 186 yds/170 m per 3.5 oz/100 g skein), 2 skeins of Color (A) Ecru, 1 skein each of (B) Charcoal, (C) Grass, and (D) Mint

- Crochet hook size US Size G/6 (4.0mm)
- Tapestry needle
- Pins, I use Clover Bamboo Marking Pins
- Scissors
Gauge
Tote: 18 stitches and 9 rows = 4”/10 cm in alternating dc and ch-1, count each dc and ch 1 as a separate stitch, (dc, ch 1) = 2 sts
Strap/Side: 17 stitches = 4”/10 cm and 10 rows = 2.25”/6 cm in sc
Finished Measurements:
Tote not counting strap: 14.5”/37 cm wide,13.5”/34 cm tall, 2.25”/6 cm deep
Tote and strap: 28”/71 cm tall with strap, this length can be adjusted easily by tying the knot higher or lower
Project Level:

Abbreviations:
- ch(s) – chain(s)
- st(s) – stitch(es)
- sc – single crochet
- dc – double crochet
- RS – Right Side
- WS – Wrong Side
Notes:
- The pattern is written in US terms.
- This pattern has been tested and professionally tech edited for accuracy and clarity.
- Ch 1 does not count as a st on Strap/Side.
- Ch 4 counts as a double crochet and a ch-1 throughout pattern.
- Tote is worked as a rectangle from the bottom up and then folded in two places forming the front, bottom, and back.
- Straps are stitched as two long rectangles which are seamed to the folded bag to create the sides. The sides extend above the body of the bag to become the strap/handle when tied together.
- Stitch count is at end of the row when it changes.
Crochet Pattern Instructions
Tote Panel
With color A ch 67.
Row 1: (RS) Work 1 dc in 5th ch from hook (skipped chs count as dc plus ch-1), ch 1, skip 1 ch, work 1 dc in next ch, (ch 1, skip 1 ch, work 1 dc in next ch) to end of foundation chain, turn – (33 dc, 32 ch).
Rows 2 – 61 or until length measures 27”/68 cm: Ch 4 (counts as 1 dc and 1 ch), skip first dc and first ch, work 1 dc in next dc, (ch 1, skip 1 ch, work 1 dc in next dc) to end of row, turn. Fasten off. Weave in ends using tapestry needle.
Strap/Side 1
Yarn is cut at the end of each row and reattached to begin the next row when there is a color change. Leave a 4” /10 cm tail at the beginning and end to incorporate into fringe.
With color B ch 177.
Row 1: (RS) Work 1 sc in 2nd ch, (skipped ch does not count as a st here or in Strap/Side 2) work 1 sc in each ch to end of foundation chain, turn. (176 sc) Fasten off.
Rows 2-4: With C, ch 1, (ch 1 does not count as a st here or throughout pattern) work 1 sc in each sc across, turn. Fasten off.
Row 5: With A, ch 1, work 1 sc in each sc across, turn. Fasten off.
Row 6: With C, ch 1, work 1 sc in each sc across, turn. Fasten off.
Rows 7-8: With D, ch 1, work 1 sc in each sc across, turn. Fasten off.
Rows 9-10: With C, ch 1, work 1 sc in each sc across, turn. Fasten off.
Strap/Side 2
Work as Strap/Side 1, following colors as:
With Color D ch 177
Row 1: Color D
Rows 2-3: Color D
Rows 4-5: Color B
Row 6: Color A
Rows 7-8: Color D
Rows 9-10: Color C
Seaming
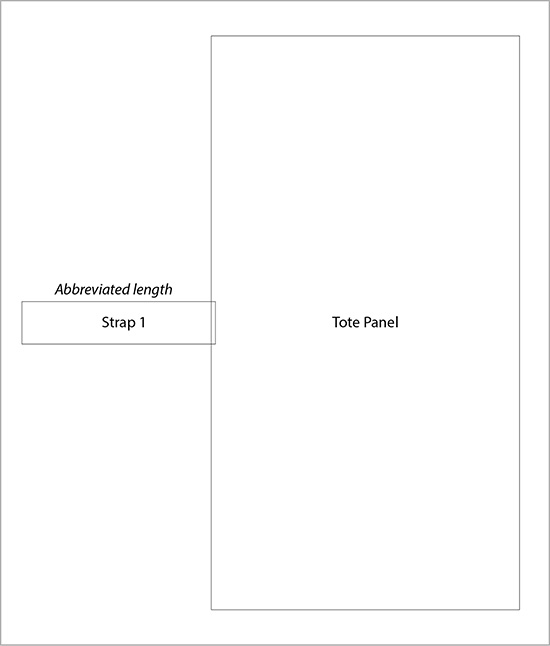
Fold the tote panel putting the narrow ends together and add a stitch marker to the center of the panel which will become the bottom of the bag.
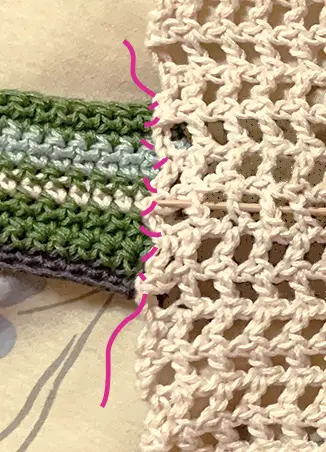
Open flat with RS facing down, then line up the center of one short end of a Strap/Side (RS facing down) with the marked center/bottom of the panel and with 1 line of stitches under the Tote Panel, pin (image 1) .
With color A, mattress stitch the Tote Panel to Strap/Side 1 while the pieces are in this position (image 2) . Stitch to the second stitch of each row of stitches because you will be adding fringe to the first. Fold pieces so WS are facing and pull the seam tight.
With RS facing, line up one edge of Tote Panel to edge of Strap/Side 1 and pin in place (image 3).
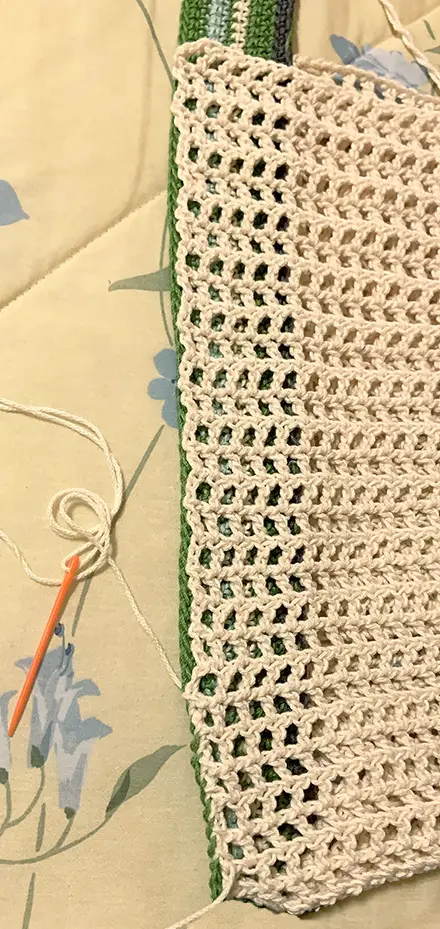
Mattress stitch from bottom edge to top. Position the seam one stitch from the edge of the Strap/Side for a clean finish on Strap/Side edge (images 4a and b).
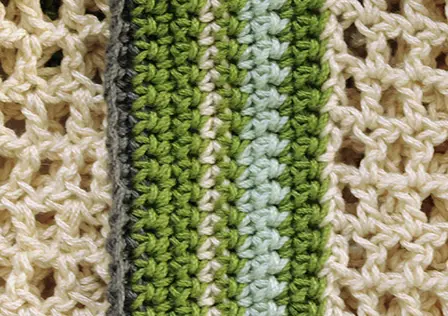
Image 4a – Left side was seamed one stitch from edge. Right side was seamed to edge. See the difference? This is why I recommend seaming one stitch from edge.
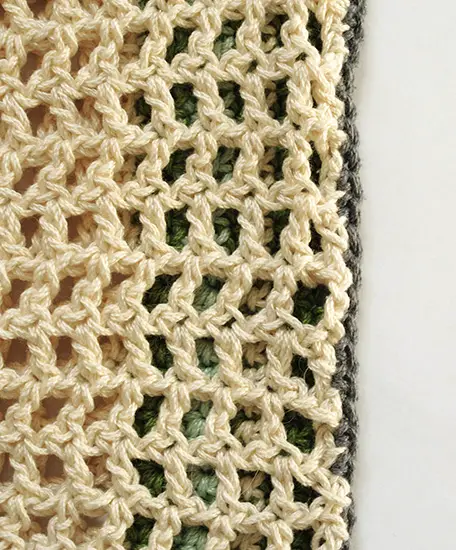
Image 4b – Here is the Strap/Side in Image 4a from a different angle. This is the RS of edge of bag. See how the panel is seamed one stitch from edge.
Repeat with the other edge of Strap/Side 1. The Strap/Side becomes the edge of the bag. (image 5).
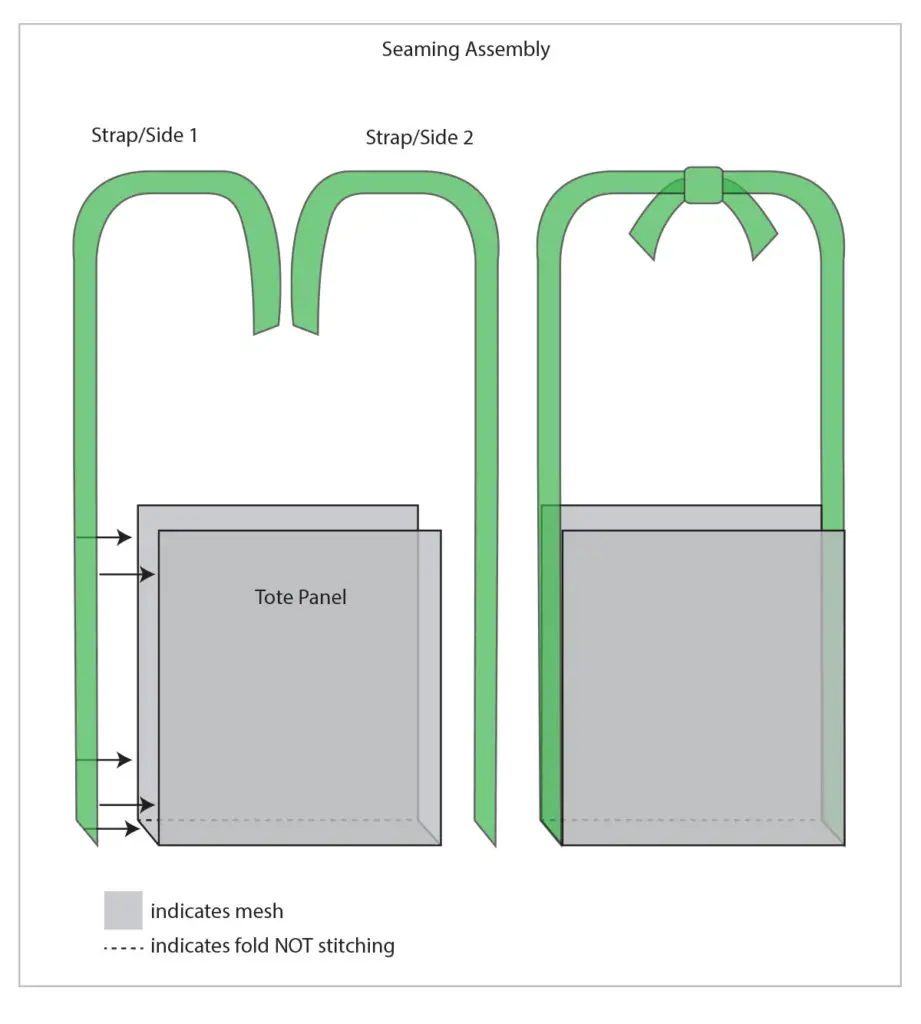
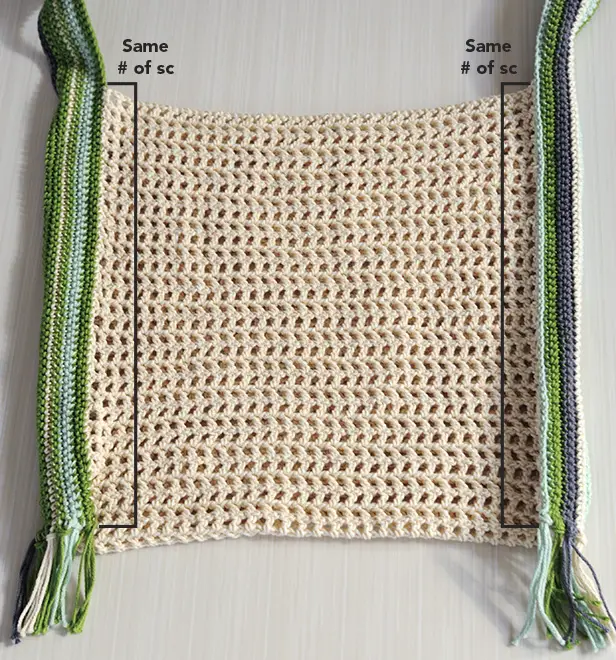
Repeat with the other edge of Tote Panel and Strap/Side 2. Tip: You can be sure the top of your bag will be straight by counting the sc up from the bottom of Strap/Side 1 to the top of the Tote Panel. Then attach the top of the Tote Panel to Strap/Side 2 in the same position. (image 6).
Tassels
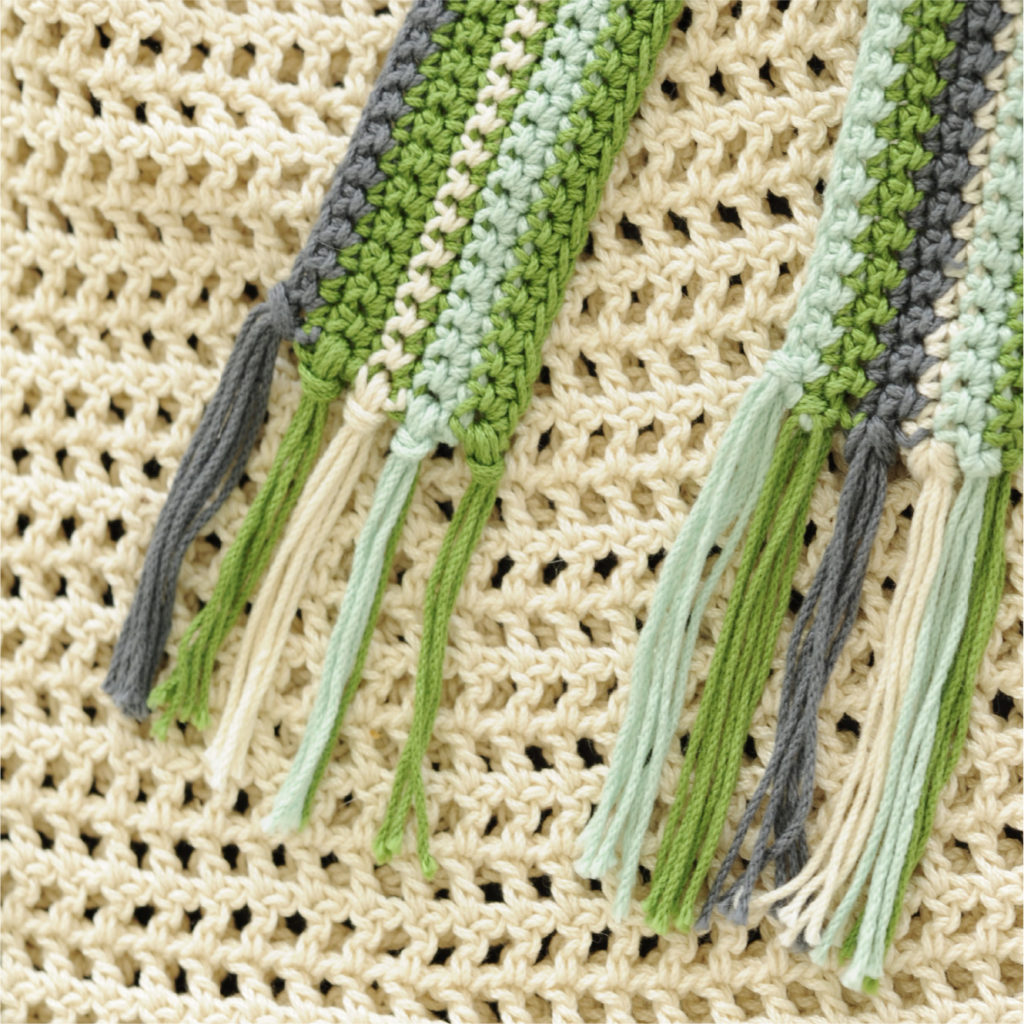
Cut 48, 8” pieces of yarn 8 of color A, 8 of color B, 20 of color C, and 12 of color D. Attach tassels (two pieces held together as one) to ends of corresponding stripes. Wherever there is an end hanging, pull it through with the tassel (image 7). Trim all ends to same length as tassel ends.
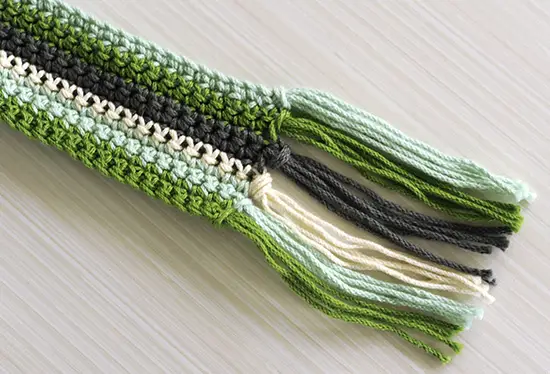
Customizing tip: If you have a different number of stripes in your Strap/Sides than I do, you may choose to add a different number of tassels. I have 6 stripes so I used 6 tassels. 5 tassels also fit very nicely across the bottom of the Strap/Side (one tassel in every other stitch of the 10 rows). If using 5 tassels per side, you will need 20 tassels all together. For each tassel cut 2 strands for a total of 40 strands.
Finishing
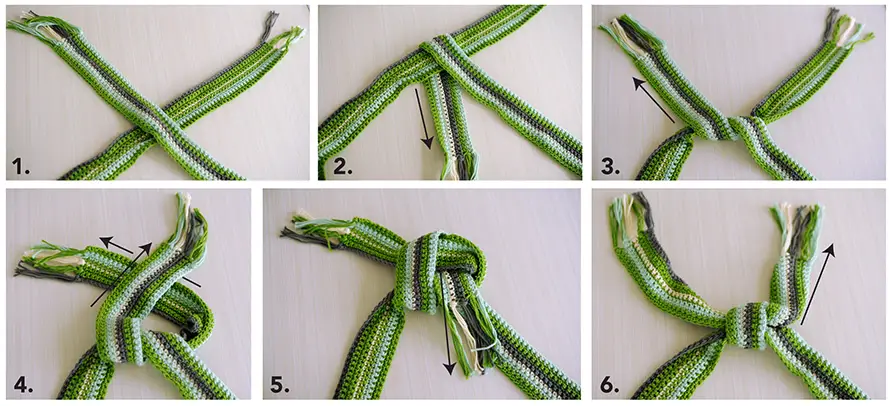
Tie the straps together with a square knot 14”/35.5 cm or desired length from the top of bag (image 8).

Mary Beth Cryan has been designing crochet patterns for over 4 years. Prior, Mary Beth worked as a professional illustrator and product designer with a specialty in paper crafts for 18 years. She has authored and illustrated 17 paper craft books, countless pop-up greeting cards, and many paper craft kits. She received 3 LOUIE Awards from the National Greeting Card Association. Some of her clients included MoMA (Museum of Modern Art NYC), American Girl, Dover Publications, Peter Pauper Press, Ranger Rick Magazine, Highlights magazine and many others. She earned a Bachelor of Fine Arts from Syracuse University in 2000.