
This post may include affiliate links, view our disclosure policy for details.
 This is very exciting, my first original free pattern for this blog. Woohoo! Here we go, let’s see where this adventure leads!
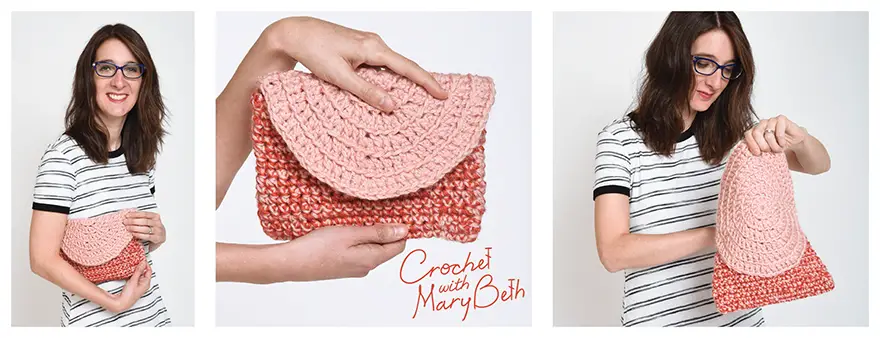
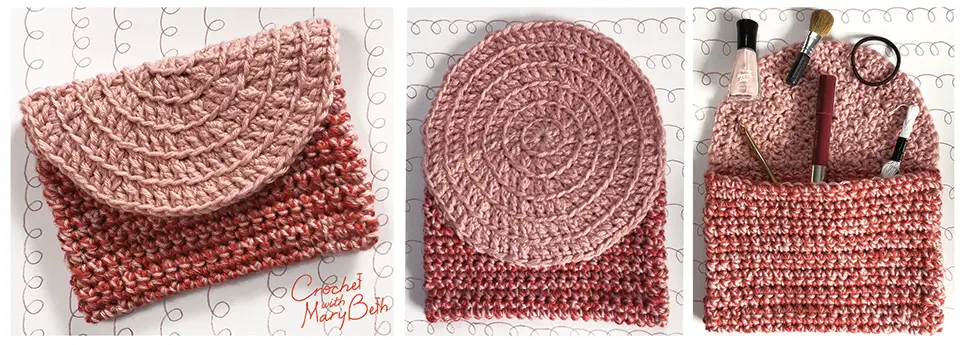
Introducing the “Circle Clutch,” the first in the series of “Seeing Spots Bags” (more coming soon!). This easy clutch crochets up quickly because you will be holding two strands of worsted weight yarn together to create a bulky yarn. If you have a dinner date or a cool event tomorrow, you still have time to make a new clutch to show off! The front flap of the bag comes down far enough to keep the bag closed so you don’t need any hardware or buttons. You just need yarn, which I know you have plenty of! Ha-ha. When the bag is open the full glory of the design is revealed. The complete circle is visible from the back, thus the name. So be prepared for oooohs and aaaahs when you reach in to grab your phone.
Save:
Circle Clutch Pattern
Materials:
-
Lion Brand Vanna’s Choice worsted 4-Medium (100% acrylic, 171 yds/156 m, 3.5 oz/ 100g), Color (A) Pink, 1 skein, and Red Heart Soft Yarn (100% acrylic, 256 yds/234 m, 5 oz/140g), Color (B) Cinnabar, 1 skein
-
Crochet hooks size US J/10 (6 mm) and US L/11 (8 mm)
-
Tapestry needle
-
Pins, I use Clover Bamboo Marking Pins
-
Scissors, EK Success Cutter Bee Precision-Cut are my FAVORITE!
Gauge:
Finished Measurements:
Abbreviations:
Notes:
-
You will be holding two strands of worsted weight yarn held together throughout the pattern.
-
You will stitch the circle flap first. Then stitch the body of the bag taking care to make sure the body width matches the width of your circle. Then the two pieces will be attached with a running stitch and a whip stitch. Finally you will turn your bag inside out and seam the edges closed with a row of single crochet.
-
Ch 3 counts as a dc throughout the Circle Flap instructions.
-
Ch 1 does not count as a sc throughout the Body instructions.
- This pattern is accurate and has been professionally tech edited. Even though my patterns are free, I still want to deliver a quality product to you.
Project Level:
Instructions
Circle Flap
Using the larger hook and holding 2 strands of A together as one, make an adjustable loop or ch 3 and sl st in first ch to form a loop.
Body
Using the larger hook and one strand each of A and B held together as one, ch 24.
Finishing
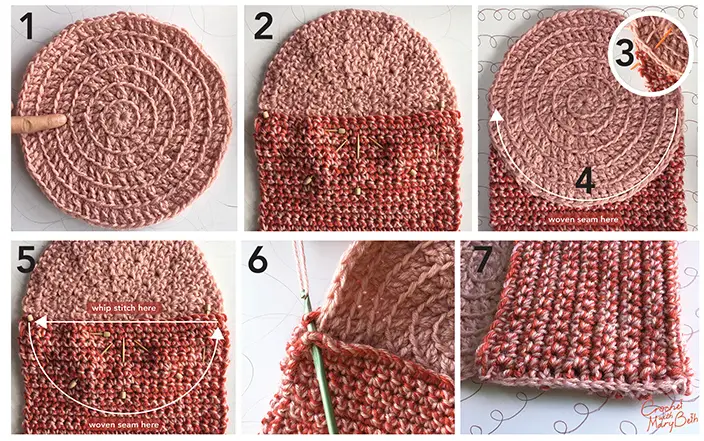
Find the part of the circle where the chains make a slight seam (image 1).
Flip the circle so the the right side is facing down (the side with the visible raised stitches) and the chain seam is on the left side horizontal. Lay the body with the right side facing down over the bottom half of the circle and lined up with the chain seam. You should be able to see the center of circle directly above the body. Positioned like this the small circle will fall perfectly on the top of the clutch when closed. Pin in place (image 2).
With one strand of color A using the tapestry needle sew the circle to the body. You will have the right sides facing you while you sew. I used a woven seam aka running stitch that goes up and down between the double crochets. The yarn disappears and the edge of the crochet is visible which I think is beautiful (image 3).
With right side facing you, start sewing at the right hand corner and proceed around the bottom of the circle (image 4). When you reach the left corner, flip piece so wrong side faces you and whip stitch the top edge of the body to circle. When stitching take care to only grab the stitches of the circle that are not visible from the right side of the bag (image 5).
Fold the body in half so the right sides are together and the circle flap is sandwiched between.
Side Seams: Using the smaller hook and 1 strand of color A seam the sides together. Starting at either top edge, join one strand of color A, place 1 sc at end of each row stitching through the front and back pieces of body at once. Take care NOT to catch any stitches of flap/circle (image 6). Proceed along edge ending at bottom edge (image 7). Fasten off. Weave in ends with tapestry needle. Repeat with other side. Turn the clutch right side out so the circle is on the outside and admire your new clutch!
Optional: For a stiffer clutch, cut a piece of thin cardboard (like a cereal box) to the inside dimensions of the bag and insert it into the clutch.
I’d LOOOOOOVE to see your Circle Clutch. Please tag me @crochetwithmarybeth on social media so I can see your beautiful creations!


Mary Beth Cryan has been designing crochet patterns for over 4 years. Prior, Mary Beth worked as a professional illustrator and product designer with a specialty in paper crafts for 18 years. She has authored and illustrated 17 paper craft books, countless pop-up greeting cards, and many paper craft kits. She received 3 LOUIE Awards from the National Greeting Card Association. Some of her clients included MoMA (Museum of Modern Art NYC), American Girl, Dover Publications, Peter Pauper Press, Ranger Rick Magazine, Highlights magazine and many others. She earned a Bachelor of Fine Arts from Syracuse University in 2000.